Now on to the inspiration...
Over the next few months, I will be sharing tons of great ideas for making toys for your little snuggler. You'll find some projects of my own design, but lots of love for other artisans and their handmade wares, as well. Fall in love with something? I'll always be sure to include links so you can find your way back to purchase them.
For our first inspiration, I'm sticking with a topic that I know well...but, I promise to branch out in the coming weeks:)
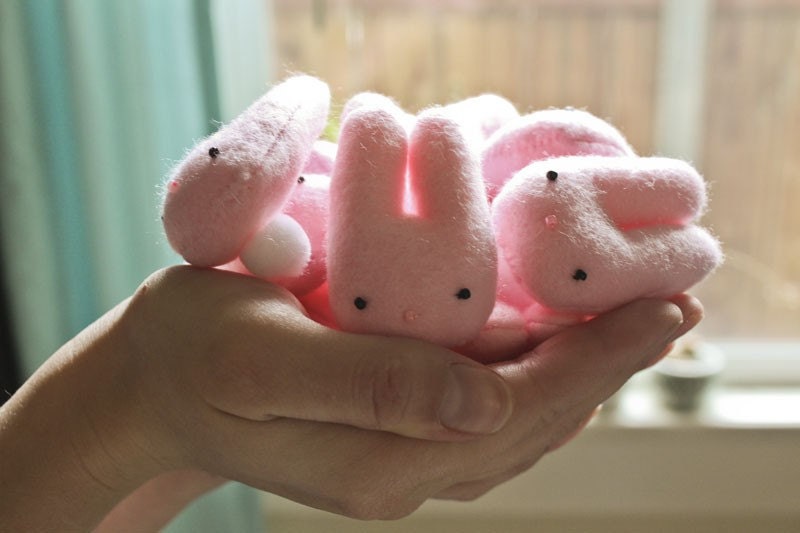
These super sweet teeny tiny little bunnies have been lingering in my Etsy favorites since last year. I just adore them! Don't you? Hop on over to arixystix and grab a few...you may even want to pick up a chick along the way:) What a great little addition to any Easter gift!
Or if you're thinking of creating softies for your contribution to our little Easter swap, then skip ahead and check out my top tips for fabulous softie construction.
Simple Soft Toy Construction Tips:
1. Stitch length is or paramount importance! You want those stitches nice and tiny. The seams of a soft toy are under constant duress simply from the stuffing, but add a pair of tiny hands, lots of hugs, and possibly a round or two of tug-o-war and things get dicey:) A short stitch length will help ensure that the stuffing stays where it is intended...on the inside!
2. Stuff your toy until it is fully stuffed...then go back and stuff it again! Seriously, the more stuffing you put in it the smoother the seams, the firmer the squeze, and the longer the life of the toy. Think back to the days of cheap quilted comforters...remember how all that stuffing would shift over time and suddenly only your feet were warm??? Same idea! So when you think you've stuffed enough, go back and add at least two more handfuls, maybe more.
3. CURVES! - When you are designing your toy keep those curves subtle! Any sharp curve will pucker and bow when you turn it...the result isn't pretty! Trust the one who has created hundreds of doll prototypes trying to perfect a graceful doll neck:)
4. Curves again - Where there is a curve there is a pucker. You can reduce the appearance of these puckers by carefully clipping the seam allowance while the toy is still inside out. On an inward curve, you will clip tiny little triangles of fabric out of the seam allowance...similar to what a pair of pinking shears will create (bonus tip - yep, you CAN use pining shears to accomplish this!). On outward curves, you want to trim as much of the seam allowance as is possible and still maintain a sound seam. Be sure you don't clip through your stitches.
5. Embellish first - If you're planning to add any details, appliques, or embroidery to the outside of your toy, do it before you put it together...trust me again. I've had more than one toy that I just wanted to see come to life, so I waited to add the face...and each time I kicked (and pricked) myself!
6. Find inspiration in the world around you and from other artists, but make the toy your own. Not only is this just good crafty manners, but it makes the toy that much more lovable if you can feel a piece of the artist in the design. PS - outside the realm of the swap, but still...if you are planning to sell anything you have made that was heavily inspired by another artist...check first! Most people are super open to sharing their creative products so long as you get permission and give credit:)
7. HAVE FUN! It's a toy, for goodness sake! It should bring a smile to your face as well as the face of the recipient:)
Now, if you haven't already...go sign up for the swap. And remember, lots of projects coming to inspire you, most of which require absolutely NO sewing, so don't be shy:)
No comments:
Post a Comment